Grilled Rib Eye Steaks

Nearly sixty years have passed since I cooked my first rib eye steaks on a charcoal grill. I had bought them with money I earned from working at the local radio station, WHSM, as a treat for my family. I had taken my Christmas Ball date to the the Blue Heron supper club where we had both enjoyed our steaks, so my motive was perhaps not entirely altruistic.

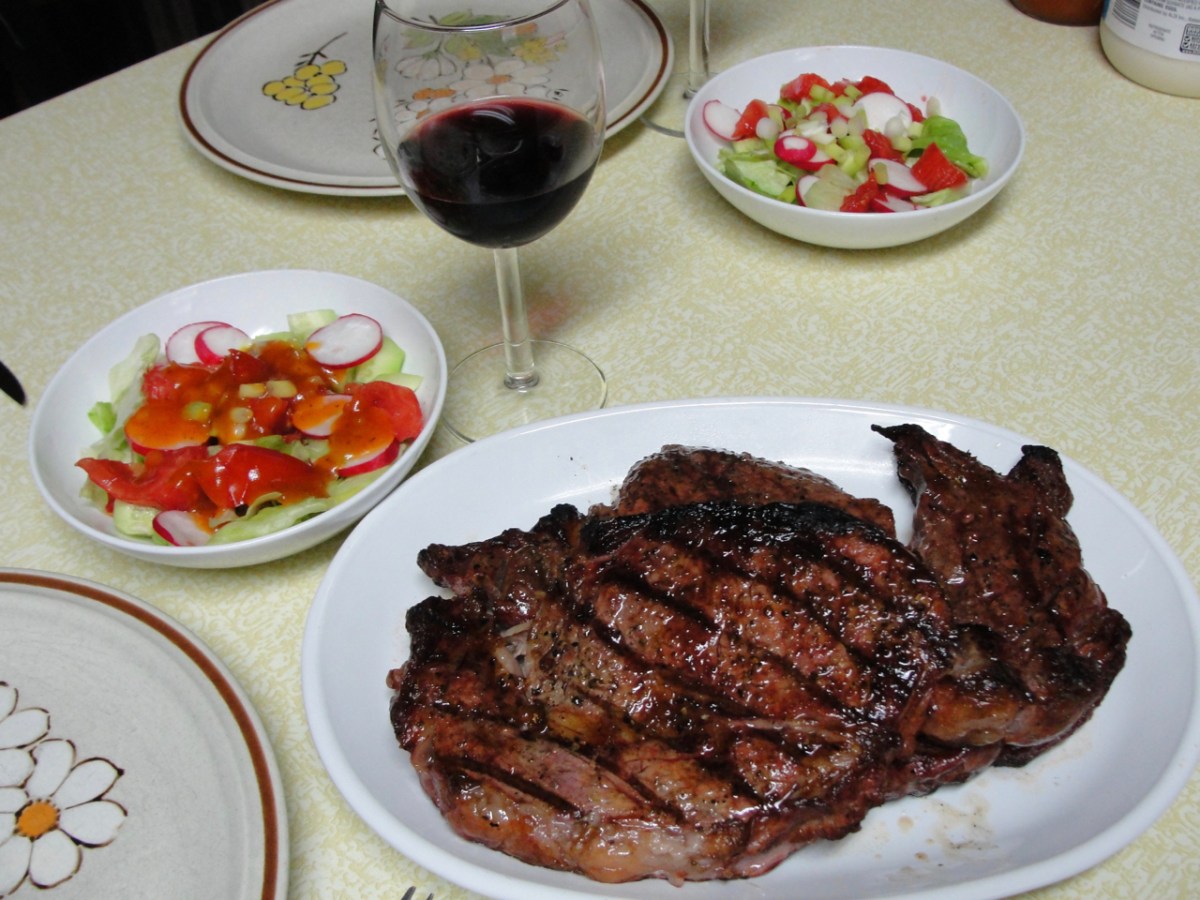
Alas, my version of charcoal-grilled rib eye steak was not quite as appetizing as the chef’s medium rare steaks brought to our table by an envious waiter. They were so tender you could almost cut them with a table knife and bright pink on the inside with attractive criss-cross char marks on the outside. A pat of butter melting over each steak made it clear that we were having a gourmet dinner.

My first attempt at grilling rib eye steaks convinced me that I had much to learn. I had to fetch paring knives for cutting them. They were the same gray inside as my mother’s pot roast but with the texture of a leather-soled boot. Instead of criss-cross char marks, each steak was a uniform black on both sides. I did put a pat of butter on each one, but even with that elegant touch, the only reason the steaks got eaten was my father’s rule that “You eat what’s put in front of you.”

Except for an unfortunate attempt to grill some bear meat, I confined myself mostly to grilling less challenging meats like hot dogs, chicken legs and hamburgers until long after I was married.

Once married, we managed to dine quarterly or at least semi-annually at a supper club serving decent steaks, so my enthusiasm for a tender rib eye was regularly satisfied. We also were fortunate in having friends who knew how to grill steaks. Unfortunately we were all chronically short of funds, so “tube steaks” were more often served than meat chopped off the loin of a steer. However, Alan cooked some fine steaks in Virginia as did John in Kentucky and Earl in Wisconsin.

It was Earl who taught me the three really important things to remember when grilling a rib eye or other good steak. First, rub it with a judicious amount of seasoning you like; second, have a really hot fire; and third, adjust the cooking time according to the thickness of the steak. To those three I add a fourth: When you spread the charcoal, add a few pieces of apple, maple or cherry wood to give the meat a hint of smoke flavor.

Many of our guests compliment me on the steaks, so we must be doing something right. Of course, it might be that my inability to get dinner done on time is the explanation. As Socrates is supposed to have observed 2,500 years ago, “The best sauce for food is hunger.”

I think, however, that if you follow the guidelines listed above, you will wow your diners with some fine rib eye steaks.

INGREDIENTS:

As many steaks as you need, 3/4 to 1 inch in thickness
Your preferred steak rub or seasoning

PROCEDURE:

Remove the steaks from the refrigerator thirty minutes before starting the charcoal to let them come to room temperature. Make a mound of charcoal large enough to provide at least two inches of coals below the steaks. Light the charcoal.

Rub the steaks on both sides with your preferred rub.

When the mound of charcoal is eighty percent gray, spread the coals in a circle large enough to accommodate the steaks. Sprinkle the wood or wood chips around the coals. Put the grill over the charcoal. Use a damp paper towel to remove any foreign materials from the grill, then arrange the steaks over the charcoal.

If the steaks are three-quarters of an inch thick, turn the steaks after three minutes. Turn them again after three and a half minutes and remove them from the grill.

If the steaks are an inch thick, turn the steaks after four minutes. Turn them after four and a half minutes and remove them from the heat.

Your steaks should be medium-rare.

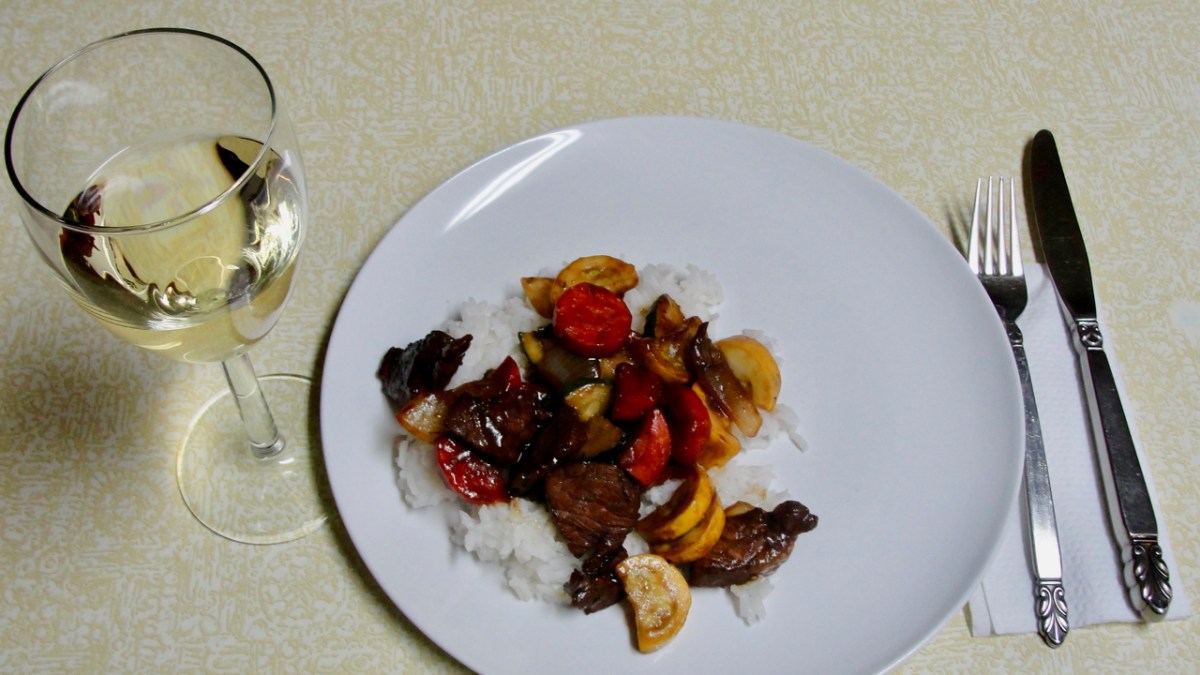
Serve with baked potatoes, kasha or pilaf.

NOTE: Be careful not to use too much seasoning. An eighth teaspoon is plenty for each side of a three quarter-inch thick steak and a bit more for the thicker steaks.

If you want your steak medium well done, add one minute to the cooking time for each side. Don’t even think about well-done.

Incidentally, here are the steaks before I grilled them. Note the light seasoning. The bottom one is the finished steak in the photo at the top of the post.

Pork and Squash Sauté

When I was growing up, there were no Community Supported Agriculture farmers or CSA’s. The first CSA’s appeared in the 1990’s. A majority of Americans still had a close connection to farmers, ranchers or gardeners. When children went to school they learned about the farmers who built our country. On the playgrounds, kids exchanged stories about grandparents, uncles and aunts who raised cows and pigs or chickens or planted huge fields of everything from alfalfa to sweet corn and carrots.

More than a third of the people in the United States in 1950 lived in rural areas. Today fewer than a fifth do. Much of the food we buy today comes from places we will probably never visit, let alone have some personal connection to the people of that area.

There are advantages to our international food supply system. Foods that were once seasonal are now available year round and other foods that were not available at all are now displayed on store shelves much of the year. People in Arizona can buy cranberries in November to go with their Thanksgiving turkey and those of us in the north country can enjoy fresh strawberries in January when our local strawberry fields are knee deep in snow.

There are disadvantages to our modern food chains as well. First, people are beginning to forget the connection between the foods they eat and the people who produce them. Second, the foods in the supermarket which often are shipped thousands of miles from the farms where they were produced can never be as fresh as those grown within a half hour’s drive of the store.

Community Supported Agriculture is a system designed to eliminate both of these disadvantages. When I was a kid, we enjoyed fresh foods grown by people we knew, which is what CSA’s make possible for people living in apartments or on city lots where it is not practicable to turn the lawn into a garden of peas, beans, beets, sweet corn or squash.

Squash. I love that gift from the Native Americans who domesticated squash plants thousands of years ago. It grows well as far north as Wisconsin and Minnesota and many squash varieties are prolific. In the first garden we had in Kentucky I planted five hills of zucchini. I learned my lesson. One can not even give away zucchini in Kentucky, except to very good friends who are too polite to say no. CSA farmers also love squash because it helps fill the boxes quickly.

Our son and daughter-in-law buy a share in a CSA at Stillwater, Minnesota, and the boxes include lots of squash. Irma does a good job with the vegetables in the box every week, but two adults and one two-year-old son can eat only so much. In a few years as the boy grows, they may have to buy an extra share to keep up with a growing appetite, but right now, Irma depends on us to help out when she has to empty last week’s box to exchange for a new box of veggies from the farmer. Thus, we get nice fresh vegetables from a local farm for free.

In return, I have been trying to answer Irma’s question of “What can I do with all this zucchini and yellow squash?” with some new recipes. Here is one I created recently that we liked a lot. It’s like a stir-fry, but I call it a sauté because I steam the onions and carrots to tenderize them and meld the flavors with the meat sauce before adding the squash to cook for just a few minutes before serving.

INGREDIENTS:

2 small boneless pork chops (2/3 – 3/4 lb.)
2 T vegetable oil, divided
1 T cider vinegar
1 T soy sauce
1/2 tsp. teriyaki sauce
1/8 tsp. garlic powder
1/4 tsp. powdered ginger
1 cup chopped yellow squash
1 cup chopped zucchini squash
1 cup chopped onion
1 cup chopped carrot
1 T water
1 tsp. chicken bouillon
1 tsp. corn starch
3 T water
Extra teriyaki sauce for seasoning

For the rice:

3/4 cup rice
1 1/2 cups water
1/2 tsp. salt

PROCEDURE:

Slice the pork into thin strips about an eighth of an inch thick by about one and one half-inches long. Put the meat into a small bowl. Add one tablespoon of vegetable oil, the vinegar, soy sauce, teriyaki sauce, garlic powder and ginger. Stir to make sure all pieces of meat are covered and allow the meat to marinate for a half hour or forty-five minutes while you prepare the vegetables or relax with a glass of wine.

Wash the squashes, remove the stem and blossom ends and and chop them into quarter-inch slices. Put them in a small bowl. Clean the onion and chop it into a half-inch dice and put it into another small bowl. Peel or scrape the carrot, cut it into quarter-inch rounds or half rounds and put them into a small bowl.

You can start cooking after the meat has marinated at least half an hour.

Rinse the rice and put it into a one quart saucepan. Add the water and salt and set the pan over high heat. When the pan has come to a boil, reduce the heat to a low simmer and cook the rice about twenty minutes or until all the water is absorbed. Fluff after the rice has absorbed the water.

After the rice has cooked for five or six minutes, put a tablespoon of oil into a large skillet over moderate heat. Add the meat with the marinade and sauté for five to six minutes, then add the onions and carrots. Add a tablespoon of water and cook for four or five minutes until the carrot starts to soften, stirring occasionally.

Add the squash and cook for about four minutes, stirring occasionally.

Dissolve the bouillon and corn starch in the water and stir it into the pan. Keep stirring until the sauce is clear, then add a teaspoon of teriyaki sauce.

Stir and serve over the rice. Offer soy sauce at the table. This recipe makes four servings.

NOTES: I have not tried it, but I think you could slice the meat and put it into the marinade in the morning before leaving for work and finish your dinner while the rice is cooking. Of course, you would not have time for the glass of wine if you did this.