When my father built our house north of Hayward, he hired a carpenter to build the kitchen cabinets. My mother told him what she needed in her kitchen. Her specifications included a flour bin large enough to hold twenty-five pounds of flour, a scoop and flour sifter. The bin was wedge shaped and pivoted on the bottom so Mom could tip it forward, scoop out the flour she needed and then tip the bin back out of the way. It looked like the other cabinet doors, except that the pull was horizontal rather than vertical.
Flour bins were still common when I was growing up in the 1940’s and 50’s. Flour came in cotton sacks that held twenty-five pounds. Besides plain white sacks, the mills began using printed fabric in a wide variety of colors and patterns for flour sacks so thrifty housewives could turn them into clothes and other useful items.
Jerri remembers the flour sack dresses her mother made for her. Esther was a careful and talented seamstress, so Jerri’s dresses compared well with those worn by the other girls she played with. Once her mother made matching pink and white floral dresses for her and Jerri. My mother knitted and crocheted. She was not a seamstress, so she didn’t make dresses for my sisters. However, she did use her old Singer sewing machine to make flour sack aprons, dish towels, curtains and pillowcases.
Flour sack pillowcases were standard but they were not as nice as the smooth percale pillowcase my mother used when she wanted to keep her hair looking nice. Jerri still chuckles when she recalls the story of an exchange between her cousin Bruce and her Aunt Hilda.
Bruce began the conversation with a request. “Mom, could I have a pillowcase?”
Surprised, his mother asked, “Did I forget to put one on your pillow?”
“Yes. It’s just a flour sack,” he lamented.
Though it was never a flour sack, I have a pillowcase that reminds me of those I slept on for many years. I have enjoyed fly fishing for trout since I was a boy. A year or so after we built our cabin along a trout stream my mother made me a pillowcase from fabric with a trout fishing pattern. The material is soft but not as smooth as percale. I love it.
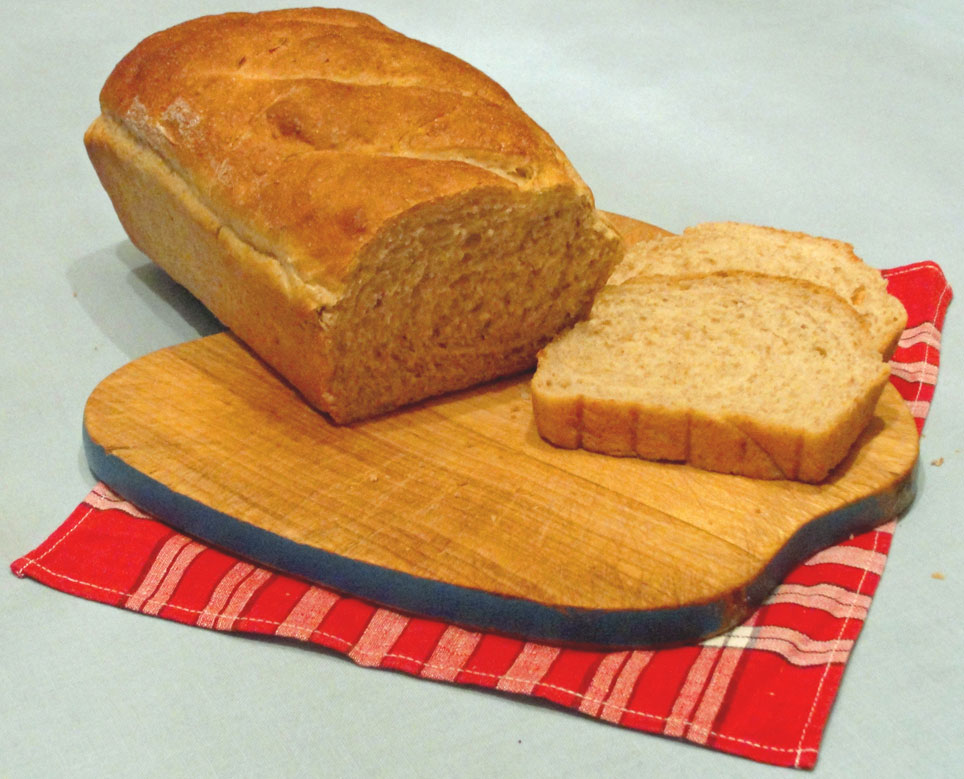
I love to bake bread too. Here is a recipe that I came up with when I asked Jerri what kind of bread I should bake. We had nearly finished the second loaf of an old fashioned white bread I had baked the week before and she suggested, “How about something with whole wheat or rye flour?”
Our No-Knead bread uses a cup of rye flour and my Cabin Wheat Bread recipe calls for whole wheat flour, but I decided to try a combination of wheat and rye flours. We like this bread a lot.
INGREDIENTS:
1/2 cup lukewarm water
1/8 tsp. sugar
1 package or 2 1/4 tsp. active dry yeast
1 cup whole wheat flour
1 cup rye flour
4 to 4 1/2 cups all purpose flour, divided
2 tsp. salt
2 cups buttermilk
3 T butter
3 T honey
1 egg
PROCEDURE:
Put 1/2 cup lukewarm water (100º to 110º) in a cup with 1/8 teaspoon sugar and stir in the yeast. While the yeast is proofing, heat the buttermilk to lukewarm and melt the butter. Blend the whole wheat and rye flours with a cup of all-purpose flour and the salt in a large mixing bowl.
Stir the buttermilk, yeast, honey and butter into the dry ingredients until you have a thick but pourable batter. If necessary, add a little more water. Cover the bowl and set it in a warm place for an hour. You are making a sponge.
After the hour has elapsed, the sponge should have at least doubled in bulk and have some bubbles on top. If it doesn’t look like that, let it continue working for another half hour or so. Stir in a cup of all-purpose flour followed by another half to three-quarter cup to make a dough that begins to pull away from the sides of the bowl.
Scrape the dough out on to a well floured surface and and turn it with a spatula or baker’s scraper to cover the surface with flour. Knead until the dough is smooth and satiny, five to seven minutes. Return it to a greased bowl, turn it to cover the dough lightly with grease, and cover the bowl with a damp towel. Let the dough rise in a warm draft-free place until it has doubled in bulk.
Grease two five by nine inch loaf pans with vegetable shortening.
Tip the risen dough onto a lightly floured surface and and knead it for five or six turns, then divide it in half and form two loaves. The easiest way to form the loaves is to flatten each half of dough and roll it into a nine by 12 inch rectangle. Roll up the rectangles into nine inch logs, sealing the edges and place them seam-side down in the pans. Cover them with a damp towel and set them in a warm draft-free spot to rise.
While the loaves are rising preheat the oven to 400º. When the loaves have risen slightly above the tops of the pans, beat the white of an egg with two teaspoons of cold water and paint the tops of the loaves. Make three or four angled cuts a quarter inch deep across each loaf with a sharp knife. Place the loaves on the center rack in the hot oven After ten minutes, reduce the heat to 350º and bake approximately twenty-five minutes longer.
When the twenty-five minutes are up, tip the loaves out of the pans and tap them on the bottom. If the loaves sound hollow, the bread is done. You can also test for doneness with an instant-read thermometer inserted into the center of the loaves. When it reads 200º, your bread is done. If you want a firmer crust, turn off the oven and let the loaves bake directly on the oven rack another five minutes. Cool them on a wire rack before slicing.
NOTES: Making the sponge with buttermilk gives the bread a hint of sourdough. If you want to emphasize this flavor, try letting the sponge work a few hours longer or even overnight.


 However, I have been experimenting with a recipe that produces a very light and tender pancake without having to beat egg whites. I have used the finished version of this recipe three times now, and the cakes have been consistently good. Last week at the cabin I took a photo of the third batch to show how light they really are.