Rustic Oatmeal Bread

I first made this bread while we were on vacation. I don’t remember where we were vacationing, though I am sure that it was at a resort where the fishing was good. As I review my many failings as a husband and father, I especially regret not taking our family on more vacations far away from places where the primary resource was water harboring trophy fish for fathers and plenty of ravenous panfish for mothers and children.

I lay the blame squarely at the feet of my parents, who both liked to fish. There are over one hundred named lakes within a thirty-mile circle of Hayward, Wisconsin, and we fished at least a quarter of them while I was growing up. We couldn’t afford vacations, but we could afford a day trip to a lake that Dad or Mom wanted to see and fish.

While Mom packed a picnic lunch, my sisters and I helped Dad dig angleworms and load the car with bait, rods, tackle boxes, paddles, swim suits, towels and 6-12 Mosquito Repellent plus a blanket or two to sit on. Finally, Dad lifted the canoe on top of the car and tied it down with our cane poles fastened beside the canoe. Soon we were off to a familiar lake or on our way to explore a new one.

Those were glorious adventures that I think help explain how we ended up at a primitive cabin that didn’t even have any bread pans on a cold rainy day when even I didn’t want to sit in a boat catching more walleyes. We already had some nice fillets in the refrigerator.

“Fresh bread,” I said, “would go good with the walleye.”

“And baking bread would help warm up the cabin,” observed my wife.

The kids applauded the idea of being able to take off their coats on what was supposed to be a summer vacation.

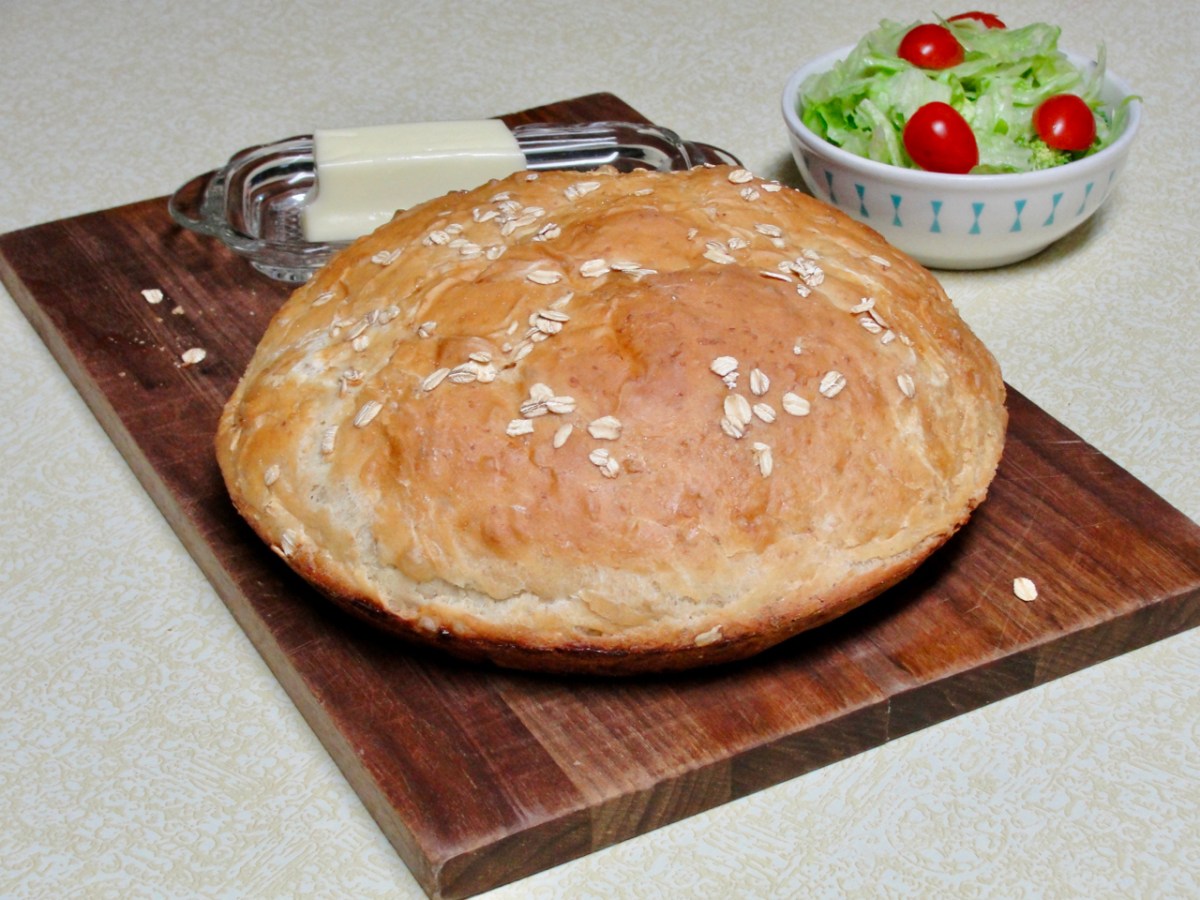
And so I baked some bread from memories of helping my mother. We had brought the ingredients with us, not because we planned on baking bread, but because we liked to cook good meals. Luckily I had tossed in a package of yeast with the idea of making some yeast-raised pancakes. Since we had no bread pans, I made free-form loaves. The egg wash gave them a nice finish.

This is a moist and hearty bread that keeps well.

INGREDIENTS

3 cups water, divided
2 teaspoons yeast
1 cup old-fashioned oatmeal
3 teaspoons salt
1/4 cup sugar
4 tablespoons butter
1/2 cup milk
About 7 cups unbleached all purpose flour
1 egg

PROCEDURE

Stir a quarter teaspoon of sugar and two teaspoons of yeast into half cup of warm (105º) water and allow the yeast to proof. When bubbles begin to form on the surface of the water, you know that your yeast is alive and well. You have proofed or tested it.

Put two and a half cups of water into a saucepan, add a dash of salt and bring the water to a boil. Stir in the oatmeal and cook for five minutes. Remove the pan from the heat and empty the pan into a large mixing bowl. Add three teaspoons of salt, a quarter cup of sugar, four tablespoons of butter and a half cup of milk. Add three cups of flour, one at a time and stir them in well. Let this mixture cool until it feels warm but not hot. Stir in the yeast and allow this thin sponge to sit until you see bubbles rising to the surface.

Add about three cups of flour one cup at a time, mixing well after each addition until you have a moist but thick dough. Flour a breadboard or countertop with a half cup of flour and scrape the dough out of the bowl. The dough will be sticky to work with, so use a baker’s scraper or spatula to turn the dough and begin working flour into it. Knead the dough until it is elastic and no longer sticky, adding flour as necessary.

Grease the bread bowl and turn the dough to cover the surface when you put it into the bowl. Cover the bowl with a damp cloth and let it rise until doubled in bulk. Grease a large baking sheet.

Remove the dough from the bowl, knead it for thirty seconds or so and divide it into three parts. Make three balls and place them on the baking sheet. Cover them with the damp cloth and allow them to rise until the dough is again doubled in bulk.

Preheat the oven to 350º while the loaves are rising.

Separate the egg and beat the white with a teaspoon of cold water. Brush the tops of the loaves and sprinkle some oatmeal on top.

Bake about forty minutes in a 350º oven. The bread is done when an instant read thermometer inserted near the center of a loaf reads 190º. Or do what my mother always did: Tap on the bottom of a loaf. If it sounds hollow, the bread is done.

NOTES: You can use butter, lard or shortening to grease the bowl and baking sheet. You can also bake the balls in greased pie plates.

The Magician’s Crepes

About three months after my mother died, my siblings and I met at the “home place” to sort the contents for an estate sale. In the kitchen and back room (where the dining table was) we found things that I had never seen. My mother liked to try new cooking equipment she saw on TV or featured in stores. There were gadgets for chopping vegetables, juicing fruits and specialized electric devices for cooking things like toasted sandwiches. I think that Mom was making paninis before I had even heard of them.

One of the items that I found there was a “Crepe Magician,” which I stored next to my desk for over sixteen years without opening the box. The flap of the carton is worn, which proved that Mom had used the pan. Finally one day I carefully pulled back the flap and removed the pan, a covered plastic plate for storing finished crepes and a little recipe book. Molded into the bottom of the pan are the words: “Made in U.S.A.”

The fact that I would be using a genuine American-made pan encouraged me, but the idea of flipping crepes as Julia Child did on her TV program was intimidating. I have flipped many things out of frying pans in my life. Fish fillets, hamburgers and hot dogs seem to develop a life of their own when I try to turn them over. I have dribbled pancakes over skillets at home and over campfires, and I once flipped a grilled cheese sandwich so skillfully that it landed about three feet from the range on the floor.

However, the instructions for cooking crepes in the little recipe book told me that I did not need to flip the crepe, which probably explains why it is called the Crepe Magician. I got out our electric mixer (1960’s vintage), dumped the ingredients into a pouring cup, beat everything together until it looked smooth and put the cup in the fridge for an hour as the recipe instructs.

The first couple of crepes did not look very inviting, but I learned to loosen the edges of the crepe with a small wooden spoon and soon was dropping rather dark crepes onto the plastic plate like a pro.

Once I had the heat adjusted properly, I made a dozen beautiful crepes in just a few minutes, and we filled them with a recipe from the little cookbook that came with the pan. The recipe called for leftover turkey, mushrooms and spinach rolled in the crepes and covered with a creamy Parmesan cheese sauce. They were delicious.

Jerri and I agreed that my first crepes were a success, so we had one more reason to bless my mother’s memory. Crepes are perfect for using up leftovers, they make meals high in flavor but low in carbs and calories and you can use them for desserts that look elegant and taste wonderful.

Here is the recipe from the Crepe Magician.

INGREDIENTS:

1/2 cup all-purpose flour
1/2 tsp. salt
1 cup milk
4 large eggs
3 T butter

PROCEDURE:

Blend the flour and salt in a one quart pouring cup or measuring bowl. Melt the butter in a small bowl and allow it to cool slightly while you combine the liquid and dry ingredients. Add the eggs and half of the milk and beat with a rotary beater until the mixture is smooth. Beat in the rest of the milk and the butter. The batter should flow in a thin stream. If necessary, add a little more milk.

Cover the cup or bowl and let the batter rest in the refrigerator for at least an hour.

Put a non-stick pan over medium heat and very, very lightly grease it. When the pan is hot, pour just enough batter into the pan to make a very thin seven-inch cake. If you pour in too much batter, you can pour it back into the cup.

If the temperature is set correctly, the edges of the crepe should turn slightly brown and the top should be dry in thirty to forty seconds. Loosen the edge with a wooden spoon and turn the crepe upside down on a plate. You will be looking at the public side of the crepe. Adjust the temperature of the burner if the crepe doesn’t look quite right and repeat until you have used all the batter.

Crepes are usually served by putting some kind of filling on the “private” side of the crepe and rolling it up like an enchilada. You can fill crepes with just about anything from scrambled eggs to fresh fruit.

Here are two photos showing how to serve crepes with fresh blueberries and whipped cream. I will post a few recipes for other fillings and sauces from time to time.

NOTES: First a note on the pronunciation of “crepe.” Having been introduced to crepes in Europe many years ago and watching Julia Child make them on “The French Chef,” I have always used the French pronunciation. The French say “crepe” to rhyme with “crept” without the “t.” In the United States and other countries, some people pronounce the word to rhyme with “drape” while others use the French pronunciation. It’s your choice.

Second, you don’t need a special crepe pan. A small non-stick frying pan or skillet will work, but a pan like our Crepe Magician makes it really easy to make nice round even crepes. You can spend a lot of money if you want, but you can also find a non-stick crepe pan like ours for less than $20.

And third, flipping a crepe just produces a few brown spots on the “private” side of it. Nobody but the cook sees the private side, so why worry about how it looks? Crepes are rolled up or folded before you serve them so your guests will see only that beautiful public side. You don’t have to flip them if they are cooked through when you tip them out of the pan. That’s why you want the tops to be dry. A crepe with a dry topside is done.