
On the twentieth of July, 1962, I had to scrape frost off the windshield of my magnificent 1950 Desoto Club Coupe. I had a summer job at WERL in Eagle River, Wisconsin, and was sharing a cabin on Silver Lake with Nelson, a friend from Hayward, who had signed on the radio station earlier that morning.
Both having grown up in Hayward, neither Nels nor I mentioned the frost to one another. Having grown up in Hayward, we expected such phenomena occasionally. I remember snow on my birthday in May and white stuff on the ground in early September.
I mention the frost in July mainly to explain why my parents seldom tried to grow squash in our garden. By August, when winter squash would be ripening, the plants might well be turning black from an early frost. The climate was more hospitable just forty or fifty miles south of Hayward, and Lake Superior created a microclimate with a longer growing season on the south shore, so that farmers there were not only successful orchardists, but also grew squash and watermelons.
On our annual family apple outing to Bayfield, Mom and Dad often bought some winter squash. Mom was especially fond of Hubbard squash, those huge blue-green monsters that supplied our family with a week’s worth of vegetable from a single fruit.
In a weak moment I bought a twenty pounder two years ago for seven dollars, which would have been a bargain if I had not neglected my purchase in the basement. By the time I checked on it, I had to use a large pail to transport that once magnificent Hubbard squash up the stairs and out to the compost pile.
Cutting open a Hubbard squash is a challenge. Mom used an axe to split it in half. She would then scoop out the seeds and pulp and cut chunks of squash from the two halves for steaming or baking. I use a saw-and-raker knife to do the job on Hubbard squash. Buttercup squash is another excellent winter squash that is best opened with the saw-and-raker knife.
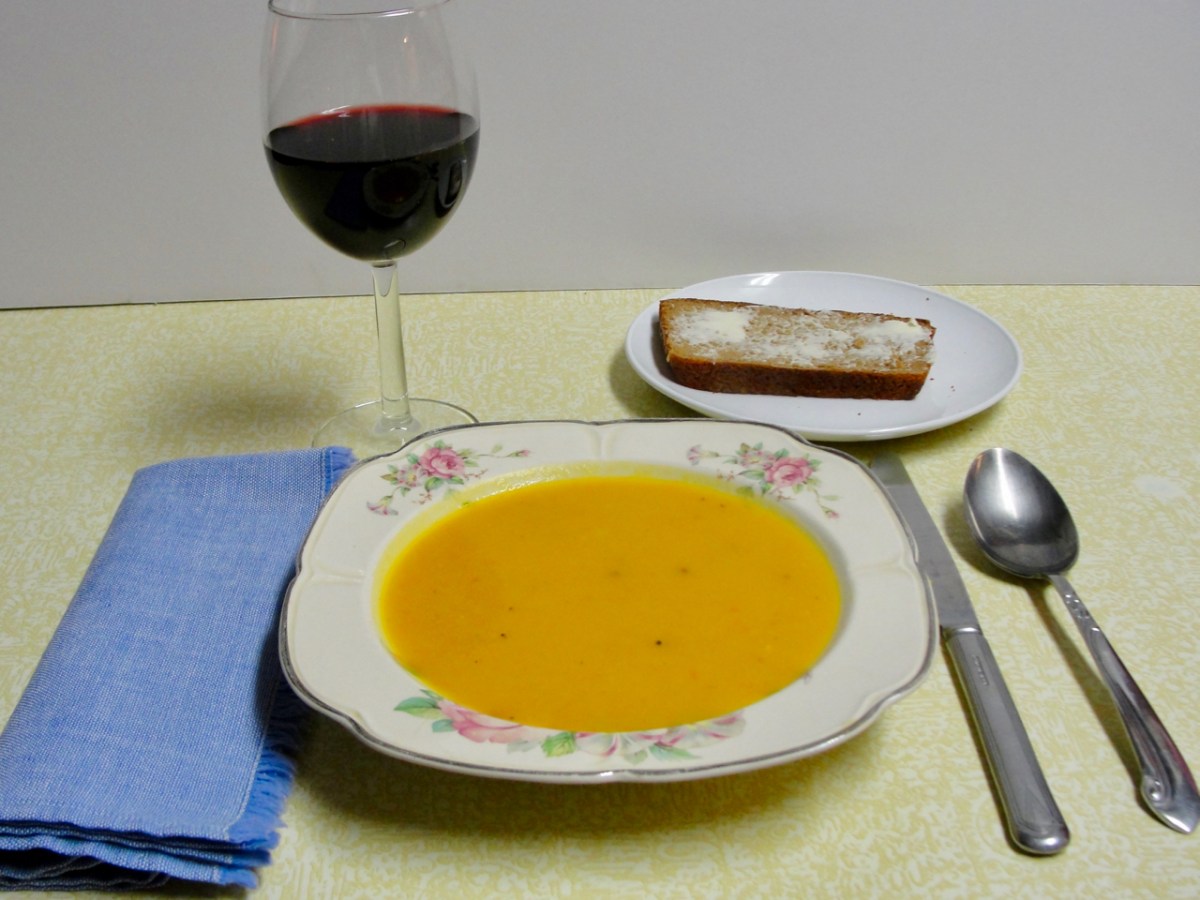
Buttercup squash have dark green rinds and bright gold flesh. They are delicious baked and flavored with brown sugar, butter, and maple syrup. They also make a wonderful soup. Many years ago, Jerri had a bowl of buttercup squash soup flavored with ginger at a local restaurant. Here is the version I came up with that she says tastes almost as good.
INGREDIENTS:
1 buttercup squash (about 7 inches in diameter)
1/2 tsp. butter
1 medium onion (2 1/2 – 3 inches in diameter)
1 medium carrot (about 1/3 cup chopped)
1 T vegetable oil
3 3/4 cups chicken broth (2 cans)
2 T fresh ginger
2 large garlic cloves
1/2 tsp chili paste
1 cup coconut milk
1/2 tsp. salt
1/4 tsp. freshly ground black pepper
PROCEDURE:
Preheat the oven to 400º. Wash and cut the squash in half and use a spoon to remove the pulp and seeds. Line a baking pan with a sheet of parchment paper and grease it lightly with a half teaspoon of butter. Place the squash cut sides down on the paper and bake it for thirty to forty minutes. Use a fork to test for doneness. The squash is done when a fork slips easily into the flesh.
Peel the onion, carrot, garlic and ginger while the squash is baking. Chop the onion and carrot into a quarter-inch dice and put them into a three quart saucepan along with a tablespoon of vegetable oil. Mince the ginger and garlic and set them aside.
Remove the squash from the oven when it is done and allow it to cool for a few minutes while you cook the onion over moderate heat. When the onion is soft and translucent, remove the pan from the heat to avoid browning the vegetables. Scoop the flesh from the squash and combine it with the onion and carrot in the pan. Add the chicken broth to the vegetables, stir well, and bring the mixture to a boil. Reduce the heat and simmer for ten minutes, then add the chili paste, ginger and garlic and cook for another ten minutes. Stir occasionally.
Purée the soup with an immersion or countertop blender or food processor. If you use a countertop blender, it is wise to blend the soup in stages, filling the blender a bit less than half full and transferring the puréed soup to a bowl so you can process the remainder.
Return the puréed soup to the saucepan. Stir the coconut milk, salt and pepper into the soup and simmer it for three or four minutes. Taste and adjust the seasoning if necessary.
NOTES: If the diced onion and carrot seem too dry when you are cooking them, feel free to add a little more vegetable oil.
If you don’t have any chili paste in your kitchen, you might try a little hot sauce or cayenne. I have not had to do this, but you really need some spice to balance the ginger and squash.
Don’t be afraid to store any leftover coconut milk in the refrigerator. Put it in a jar with a screw cap. It will keep fine for at least a couple of months.

